Guides / Production ·
How to make melodic techno in Ableton Live
A full walkthrough from empty session to finished record, using Ableton stock devices, Serum, Valhalla and Kickstart. Kick tuning, band split sidechain, gated leads, reverb architecture and the arrangement discipline the genre actually runs on.
Most melodic techno tutorials show you how to make a sound. Very few show you how to make a record. The gap between those two things is where almost everyone stalls, sitting on a gorgeous eight bar loop that never becomes anything.
This is the long version: empty Ableton session to finished track, in the order I actually work. The tools are the ones on my own machine, which are Ableton Live, Serum, the Valhalla reverbs and Nicky Romero Kickstart. If you have a different reverb or a different synth, almost all of this still applies. The principles are not brand specific.
One promise up front. Where I tell you what another producer does, it is because they said so on the record and I have linked the source. Everything else is what happens in my sessions, offered as one working method rather than the correct one.
Before you open Live: the two decisions
Melodic techno is a genre of restraint, and restraint is much easier when the frame is set before you start.
Tempo. The genre broadly lives between 120 and 126 BPM. My own released tracks sit at 122, 127 and 128, which tells you the edges are soft. Slower gives you space and menace. Faster gives you drive and costs you room. Pick before you write, because the groove you invent at 124 will not feel the same dragged to 120.
Key. Minor keys, overwhelmingly. Northern Soulmates is Gb Minor, Chain Reaction is G Minor, Other Side is B Minor. There is no rule here beyond the fact that the genre trades in melancholy and minor keys get you there faster. If you DJ your own music, knowing the Camelot code matters as much as the key name, so write it in the clip name now and thank yourself later.
Set the tempo, drop a reference track into a muted audio channel, and leave it there for the whole build. Not to copy. To stop you drifting.
1. The kick, and why you tune it
Everything in this genre sits on the kick, so it gets built first and it gets built properly.
You want a kick with real low weight and a short, defined tail. Not a booming 808, not a thin click. In practice that means the fundamental sits somewhere around 50 to 60 Hz, and the whole thing is done inside roughly 400 ms.
The step almost everyone skips: tune the kick to the key of the track. A kick is a pitched sound, it just decays fast enough that you stop hearing it as one. If your kick’s fundamental is sitting at F and your bassline is in G, those two are fighting every single beat and no amount of EQ will fix it, because the problem is musical rather than spectral.
Drop the kick into Simpler, and use the Transpose control to move it until it sits with the root. Trust your ears over the numbers. When it locks, the low end suddenly sounds louder without being louder, which is the sound of two things no longer cancelling each other.
If you are layering, and you probably should, keep the jobs separate. One sample provides the sub weight. A second provides the click and the top end attack. High pass the click layer hard, around 200 Hz, so it contributes attack and nothing else. Group them, and treat the group as one instrument from that point on.
2. Sidechain: where Kickstart earns its place
Sidechain compression in this genre is not an effect, it is the thing that makes the groove breathe. Kickstart exists because doing it with a compressor is fiddly and doing it with a volume shaper is instant.
The basic move is known: put Kickstart on the bass, and the bass ducks each time the kick lands. Two things make a much bigger difference than most people realise.
Use band split. Kickstart 2 can duck only the frequencies below an adjustable cutoff, leaving everything above untouched. On a bassline, set that cutoff somewhere around 150 to 250 Hz. Now the sub gets out of the kick’s way, while the mid range grit and the harmonics that carry the bass on a phone speaker stay exactly where they are. You get the space without the whole track lurching. This one setting is the difference between a mix that pumps musically and a mix that sounds like it is gasping.
Sidechain the reverb return, not just the sources. This is the one that transforms a muddy melodic techno mix into a clean one. Your reverb return is generating a constant wash of low mid energy that sits directly on top of the kick. Put an instance of Kickstart on the return itself, and the entire reverb tail ducks with every kick. The space stays huge, the low end stays clear, and nobody can point at what you did.
Kickstart 2 can follow the transients of any rhythmic audio rather than just a four to the floor pattern, so if your kick pattern breaks in the bridge, the ducking follows it rather than marching on regardless.
Curve length is tempo dependent. At 122 you can afford a longer, more luxurious duck than at 128. Set it by feel against the kick, in solo, then check it in the full mix, because the two rarely agree.
3. Bass
The bassline deserves its own article and it already has one, so rather than repeat it here, the full breakdown of sub and mid layering, the pluck envelope, saturation and the rolling sixteenth groove is in how to make a driving melodic techno bassline, built around the exact patch from Chain Reaction.
The one thing worth repeating, because it is the most common fatal mistake: keep everything below about 120 Hz in mono. Stereo widening on a sub feels enormous in headphones and collapses to nothing on a club system, where the two sides phase cancel. Put a Utility on the bass group and set the bass mono frequency. It costs you nothing and it saves the track.
4. The lead, in Serum
This is the sound people mean when they say melodic techno: something detuned and enormous and slightly sad, arpeggiating away in the middle distance.
Start in Serum with a saw wavetable. Turn unison up to five or seven voices, and set detune low, somewhere in the 0.15 to 0.3 region. Detune is the single most abused control in this genre. Past a certain point you do not get wider, you get seasick, and the pitch centre smears until it no longer agrees with your bassline.
Add a second oscillator an octave up at much lower volume for air. Filter both through a low pass, and here is the important part: give the filter an envelope with fast attack, a decay somewhere around 200 to 400 ms, low sustain, and route a healthy amount of it to cutoff. That is the pluck. It is the same envelope trick as the bass, which is not a coincidence, it is the genre’s fingerprint.
Then gate it. The rhythmic, stuttering quality on a lot of these leads is not played, it is gated. The cleanest way in Serum is an LFO assigned to the master level, drawn as a stepped square shape and synced to sixteenths. Draw some steps shorter than others and it stops sounding mechanical. Alternatively, program the gate as MIDI note lengths and keep the LFO for something else.
Give it somewhere to go. A static patch dies in eight bars. Assign wavetable position to a macro, assign filter cutoff to another, and automate both slowly across the arrangement. The lead in the first drop and the lead in the last drop should be recognisably the same patch in a different mood. Serum 2 added granular and spectral oscillators alongside the wavetable engine as a free update for existing owners, and the spectral oscillator in particular is worth an afternoon if you want lead textures that do not sound like the factory library.
If you do not own Serum, Live’s own Drift will get you a long way, and Meld is genuinely strong at the textural, drone side of this sound.
5. Space, which is mostly Valhalla
Melodic techno is a wet genre. The reverb is not a finishing touch, it is a structural element, and the difference between amateur and professional here is almost entirely architecture rather than plugin choice.
Use returns, not inserts. Set up three: a short room, a long hall, and a delay. Send to them. The moment you put a reverb directly on a channel you lose the ability to duck it, EQ it, or automate it independently, and you will want all three.
VintageVerb for the main space. It models the character of 1970s and 1980s digital reverbs, and that slightly grainy, coloured quality is exactly right for this music. Large size, long decay. The control that matters most is pre-delay. Set it somewhere around 20 to 40 ms and the reverb starts fractionally after the dry sound, which keeps the transient crisp while the tail still goes on forever. At zero pre-delay everything smears together and the mix loses its edges.
Supermassive for the breakdown. It is free, it produces tails that stretch well past anything reasonable, and it is perfect for the moment where the drums drop out and you need the track to feel like a cathedral for sixteen bars. Automate the send up into the breakdown and back down before the drop rather than leaving it constant.
Delay for movement. A dotted eighth ping pong delay, synced, with the feedback high enough to blur but not to build. This is what makes a simple four note motif sound like it is doing far more than it is.
Two EQ moves on every reverb return, without exception. High pass the return around 300 to 400 Hz, because reverb on low frequencies is just mud and it is the single biggest cause of a mix that will not get loud. Low pass it somewhere around 8 kHz, which pushes the space behind the dry signal and stops the top end turning to hiss. Then put Kickstart on it, as above.
6. Atmosphere
The gap between a track that sounds finished and one that sounds like a demo is usually the layer nobody consciously hears.
White noise with a slow filter sweep under a build. A reversed cymbal into every section change. A field recording, faded almost to inaudible, running the whole way through. Live’s Roar will add grit and colour to any of these, and Spectral Resonator will turn a dull recording into a tuned, atmospheric drone that you can pitch to your key.
Test: mute that layer and the track should feel slightly worse in a way that is hard to name. If muting it changes nothing, it is not doing anything. If muting it obviously changes the track, it is too loud.
7. Arrangement, which is the actual hard part
Sound design is the part people enjoy and arrangement is the part that decides whether the record works.
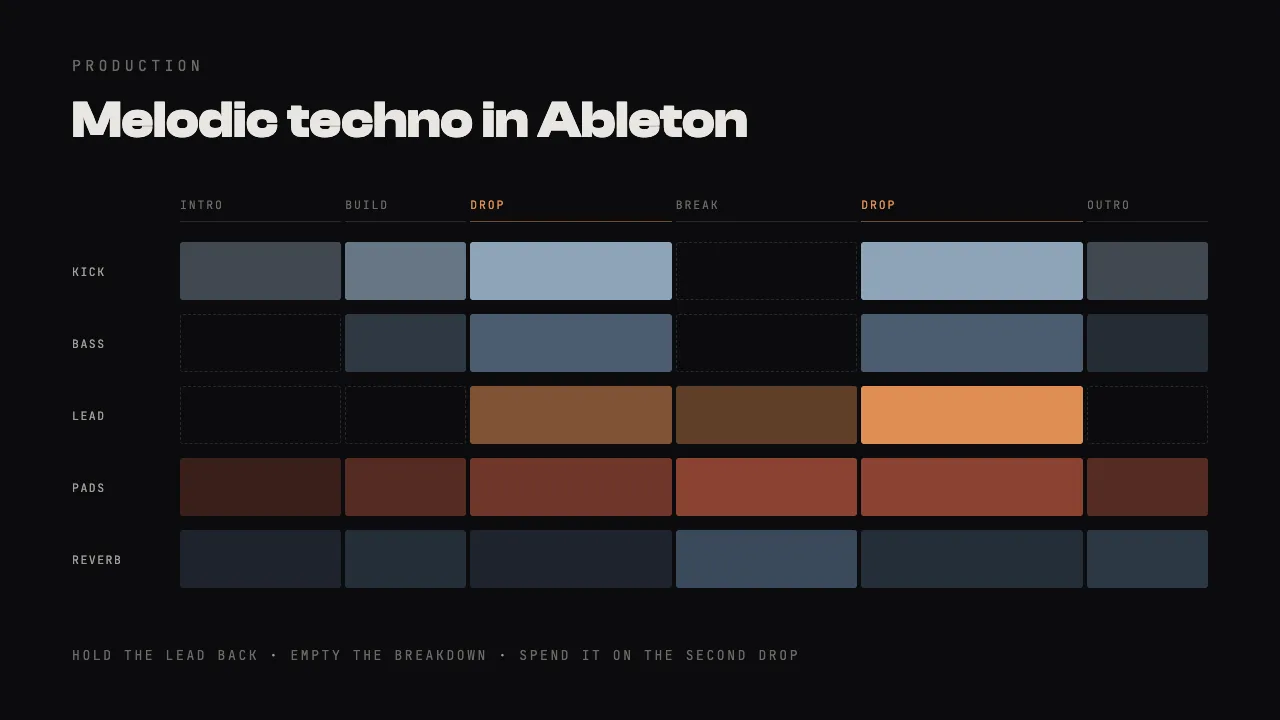
The genre’s structure is built around patience. A long, mixable intro of sixteen to thirty two bars that a DJ can work with. A first drop that deliberately holds something back. A breakdown that strips almost everything and lets the reverb do the talking. A second drop that finally delivers the element you have been withholding for four minutes. An outro long enough to mix out of.
The discipline is subtraction. The reason an Afterlife style track feels enormous when the lead arrives is not that the lead is loud. It is that the preceding ninety seconds were nearly empty. If your intro already has the pads, the arp, the lead and the counter melody in it, you have spent everything and the drop has nowhere to go. Take things out until it feels slightly too sparse, then take out one more.
Decide early whether you are making a club version or an edit. My released tracks run between 2:45 and 4:13, which are edit lengths, tightened for streaming. A club version of the same track keeps the long runways. Doing both from the same session is easy. Trying to make one arrangement serve both purposes is not.
8. Mixdown
Reference constantly, at low volume, against that muted track you dropped in at the start.
Leave headroom. Aim for the master hitting around minus 6 dB before you put anything on it. Loudness is a mastering decision and a limiter cannot rescue a mix that was already squashed on the way in.
Check in mono. Most club systems are effectively mono in large parts of the room, and any element that vanishes in mono is going to vanish on the floor.
Then leave it alone for two days. You cannot mix a track you have heard four hundred times in one sitting, and the fixes that seem urgent at 2am are usually not the real problems.
What the big artists actually do
Be sceptical of the enormous amount of content promising the exact Anyma patch. Almost none of it comes from the artists. It is reverse engineering by ear, which is a legitimate way to learn but is guesswork presented as fact, and copying someone’s guess about someone else’s synth settings is a poor use of your evening.
Some of it is genuinely documented, and that is worth far more.
Stephan Bodzin has described his live setup in detail for DJ Mag, and it is instructive precisely because so little of it is in the box. The Moog Sub 37 is, in his words, “the backbone of my music and my live set”, with drums coming from Ableton, which also triggers the Sub 37 for the Moog basslines. He prepares scenes in Ableton for each track so he can jump between them and improvise the moment and intensity of the drops. He also points out that the Moog Matriarch saves no presets at all, which is a constraint most of us would run from and he treats as the point.
The transferable lesson there has nothing to do with owning a Moog. It is that he built a setup that forces decisions to be made live rather than recalled. You can get a version of that in Ableton for nothing by committing your automation, resampling your synth to audio, and refusing to let yourself go back and tweak the patch.
The Afterlife sound that defines the modern genre came out of the label Tale Of Us founded in 2016, and if you want the aesthetic rather than the settings, listening to that catalogue in order will teach you more about arrangement restraint than any tutorial.
For technique with actual rigour behind it, Attack Magazine remains the best writing on techno production anywhere, Ableton’s own Learning Music is free and better than most paid courses at fundamentals, and the Live manual’s instrument reference is genuinely worth reading rather than searching, because most producers are using perhaps a third of what is already installed.
Bodzin’s own advice in that interview is the best note to end on: “Try to invent. Polarise. Irritate. Confuse. Don’t go for what you’ve seen already.”
Which is, ironically, the one instruction that no tutorial including this one can help you with.
Now go and use it
Reading about sound design trains nothing. Pick one thing from this and do it tonight. Tune your kick to your key. Put band split on your Kickstart. Sidechain your reverb return.
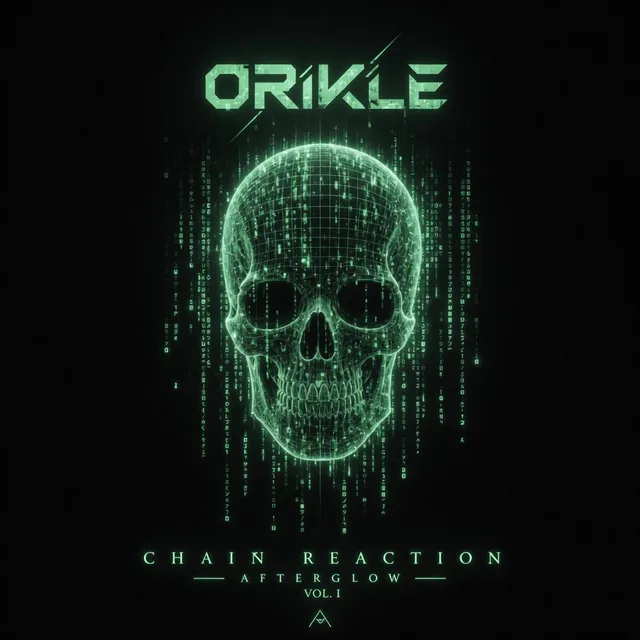
If you want to hear these decisions in a finished record, Chain Reaction at 127 BPM in G Minor is the most aggressive of my three, Other Side at 128 in B Minor leans hardest on the reverb architecture above, and Northern Soulmates at 122 in Gb Minor is the most restrained. All three are playable from the bar at the bottom of this page.
And if you want the DJ side of the same coin, that is in how to DJ melodic techno.